Grab your hiking books and come explore Chulilla! Valencia has plenty of outdoor excursions that are worth visiting, and Chulilla is definitely one of the most popular. This small town is famous for the hanging bridges that connect the two sides of this natural gorge. If you want to escape the city for the day, here’s everything you need to know about Chulilla, Valencia.
Chulilla
Chulilla is a small town that’s northwest of the city of Valencia. This quaint town is home to one of the most popular hiking trails. That means that from Valencia, Chulilla is the perfect one-day getaway.
There are several different trails, but the most popular one connects Los Puentes Colgantes with the Ruta de los Calderones. Here, you can walk across the iconic bridges and explore a towering gorge that holds the Túria River.
Located only 45 minutes from Valencia, this is a great way to spend a day out in nature. From hiking to rock climbing – there are plenty of outdoor activities for everyone.
Note: Check out the Town Hall Website to make sure there aren’t any sudden closures. Sometimes in the summer, they close it if there is a risk of a wildfire.
Hike Overview
For this Chulilla day trip, I recommend taking the route that allows you to see the hanging bridges, the gorge hiking trail, and the Loriguilla Dam.
- Distance: 10km (6.2 miles) in total
- Type: Linear (same path there & back)
- Time: Around 3–4 hours
- Difficulty: Low–Medium
- Family-Friendly: Yes
- Elevation Change: Around 300m
Overall, this is a relatively easy hike for most people. The most difficult part is directly at the first bridge, where there’s a significant elevate change. The rest of the path is relatively flat.
If you only care about seeing the bridge, then the route is much shorter. In this case, it shouldn’t take more than 2 hours for the average person.
Note: I went with my partner relatively early in the morning. We walked the entire trail, stopped multiple times for pictures, as well as stopped to eat a sandwich. In the end, it took us just over 3 hours. So if you’re traveling with kids or have trouble with physical activity, it may take you a bit longer.
What You’ll See
Let’s take a look at everything there is to see at the Chulilla hiking trail. There are a couple of different options, as well as some different names for the same trail.
Here’s what you need to know about the Chulilla hike:
The Ruta de los Calderones and the Ruta de los Pantaneros is the same thing. This trail ends at the Embalse (the man-made lake created for the Loriguilla Dam). Plus, both of these are the extension of the Ruta de los Puentes Colgantes.
In other words, if you plan to see the Ruta de los Calderones – you’ll walk over the hanging bridges by default. If you finish this trail, you’ll end at the dam. All of them also have the same starting point.
It is possible to drive directly to the dam, but you’ll skip the actual hiking trail if you do this, so I don’t recommend it. In my opinion, the hiking trail was the best part.
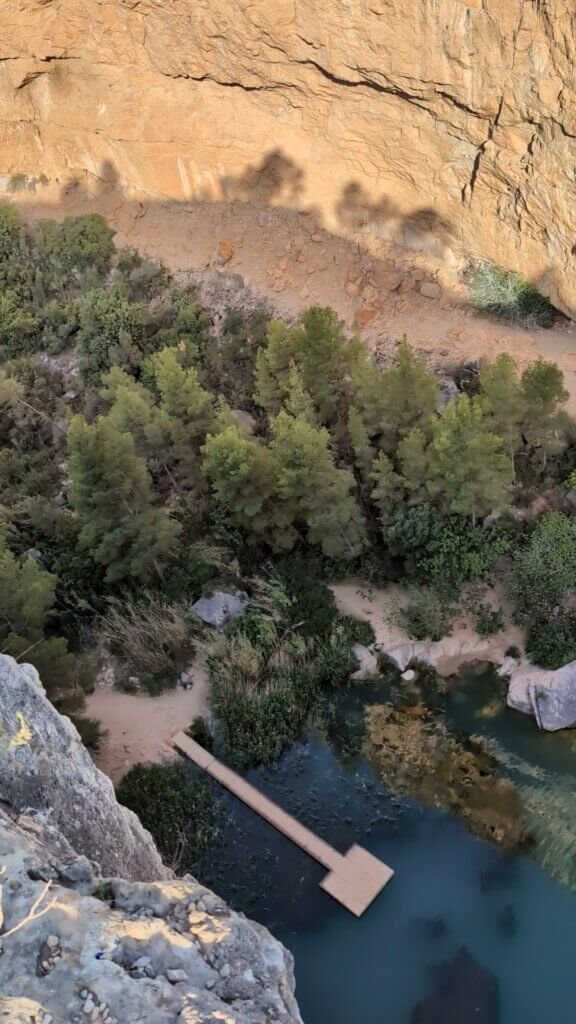
You will also walk by the Charco Azul, and you’ll get an aerial view of it. However, if you want to swim here, you’ll have to divert a bit and go down. Personally, I wouldn’t recommend doing this part as well – but if you want to spend the entire day in the town – you can do this in the afternoon!
Now, let’s go into more details about what you’ll see:
Los Puentes Colgantes
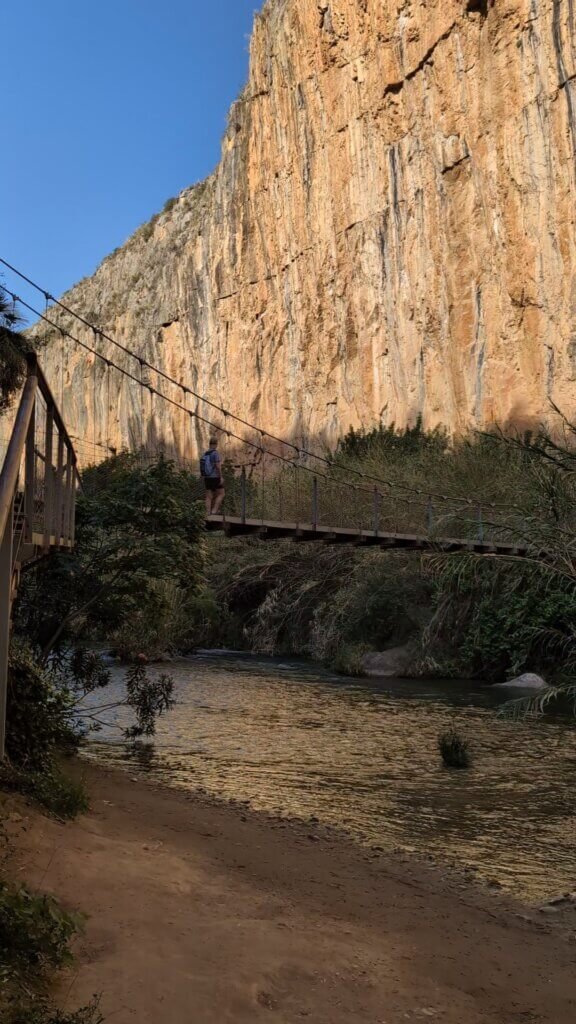
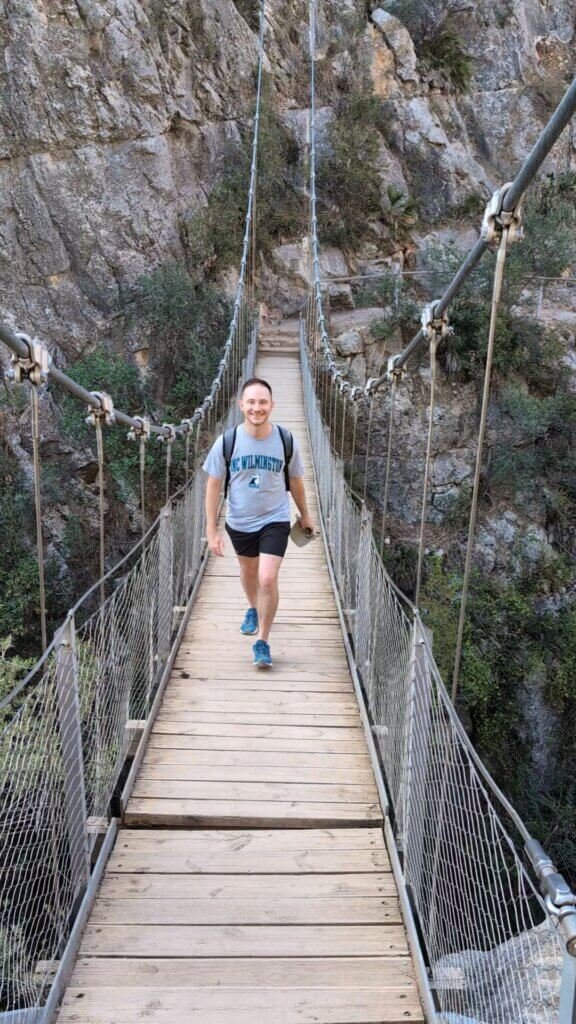
There are two large hanging bridges that connect both sides of the gorge. The first one is relatively high up, and is the most famous one. The second one is much lower. So if you’re afraid of heights – there’s only one bridge that’ll make you nervous!
This is definitely one of the coolest parts of the excursion.
For this part, you might also need to have some patience. Many people want to take their pictures here. Plus, both sides of the bridge have a relatively steep and narrow staircase. In other words – there’s a bit of a traffic jam here!
I solved this by coming super early in the morning! So the earlier, the better.
The Túria River
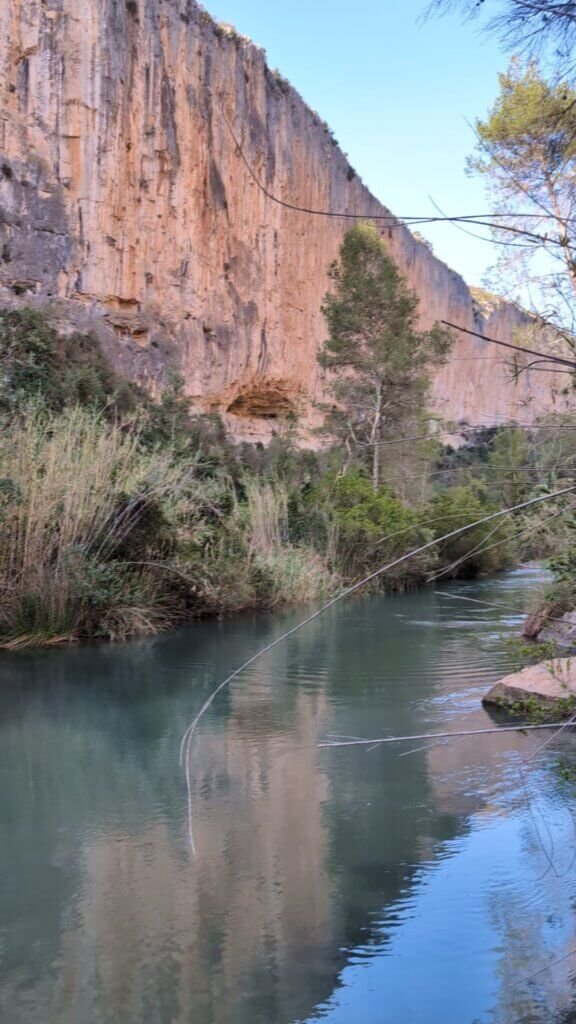
During the entire route, you’ll have the Turia River flowing next to you.
In case this name sounds familiar – this is the river that originally divided the city of Valencia in half! These days, it was diverted away from the city and the old river bed has been transformed into the Turia Gardens.
But here in Chulilla, you get to walk along Valencia’s most important river and get a chance to explore nature.
➡️ Make sure to check out the Turia Gardens and all the other things to see in Valencia!
Ruta de los Pantaneros
Also known as the Ruta de los Calderones, this hiking trail cuts through this natural gorge and ends at the Loriguilla Dam.
It gets its name from the fact that this was the trail that people took to work on the dam. People would hike from Chulilla every day during construction. This is actually why the hanging bridges were built in the first place!
So what was once a normal commute to work has become a tourist attraction to appreciate the natural landscape.
For the majority of this trail, you’ll be surrounded on both sides by the towering mountain walls. As you walk next to the river, it becomes a pleasant hike and a great way to get in touch with nature.
Loriguilla Dam
The dam at the end of the route is a crucial part to Valencia’s ecosystem. By controlling how much water flows into the Turia river, it helps maintain the local ecology and support the immense agricultural efforts.
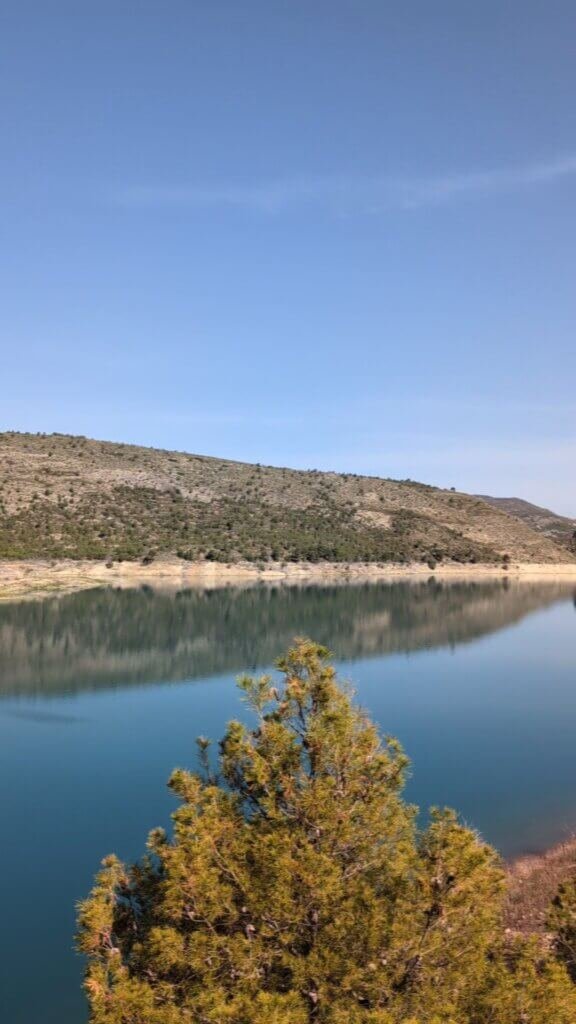
The dam is connected to this water reservoir (embalse). You’ll see lots of people who come out here for a picnic and to enjoy some time in the sun.
The water reservoir is a lovely sight to see, especially after hiking all the way there!
After you get the dam, you just take the same path back when you’re ready.
How to Get There
Let’s talk about how you can get to Chulilla. Valencia is only about 45 minutes away by car, so this is fairly accessible.
Since I live in Valencia, my partner and I drove there directly. The route was quite simple and parking was very easy as well!
So here are a few options to get from Valencia to Chulilla:
By Car
Whether you’re renting a car or taking your own, the path is the same. You’ll take CV-35 for the majority of the trip.
To park, you have a few options:
- Park before entering the town
- Park at the designated area right after crossing the town
- Park directly next to the trail
If you park before entering the town, you’ll be relatively far away from everything. But this is an option if you’re coming in the summer and you don’t want to bother with driving through the town.
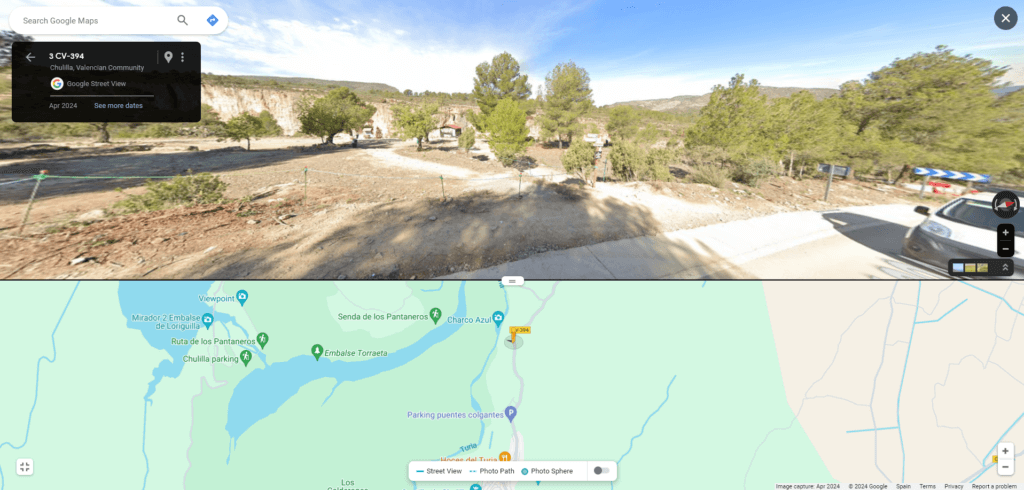
Right after crossing the town, there is a designated parking area. This shows up on Google Maps and is labeled (parking puentes colgantes) in the picture above.
Note: This parking lot starts the climbing trails – not the hiking trail. It’s about 500m from where the hiking trail starts, so you’ll need to walk on the road for about 5 minutes.
Directly next to the trail start, there is a dirt lot you can park in. This is closer, but it’s a bit harder to park here. In the picture above, the Person Icon is where you would park, with the Google Street View being the view FROM the parking area, looking AT the trail start.
If you want to head into the town, I’d park at option 2. But if you’re just doing the trail and heading back – go for option 3.
By Tour
Naturally, jumping on a group tour is an excellent way to go! This Private tour is the highest rated one I’ve seen, and they offer to pick you up and take you back.
This is a great option for people who don’t want to worry about anything. No renting a car, no bothering with public transport.
Have someone guide you the whole way, learn some interesting history, and have a stress-free experience!
By Public Transport
There are no public transport options, but there are private transport companies you can hire to take you there. Transviago is the bus service you would use to go there. This is relatively inexpensive, but you do need to make sure you’re timing everything perfectly!
Another option is to hire and schedule a taxi. This would likely come out to be around the same price as renting a car and paying for gas – but if you don’t want to drive, this is an easy solution too!
If you want to schedule a taxi, I’d recommend looking into Cabify. I’ve had the best experience with them in Valencia.
Where Does The Hike Start?
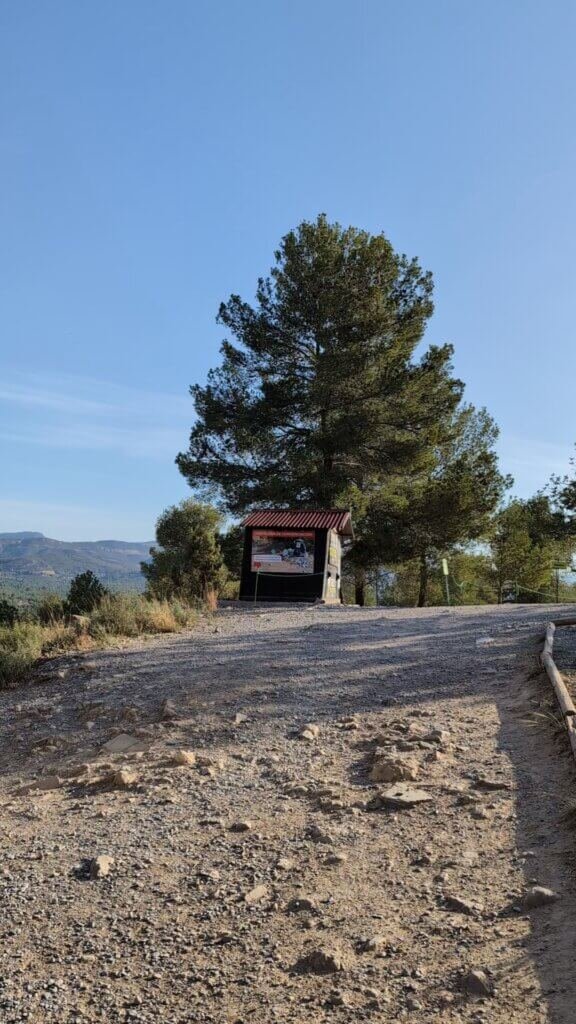
The Chulilla hiking trail starts off the main road (CV-394) at a well-marked building. There is a small area with cones, a picnic area, and a kiosk-style building right at the entrance.
This is the easiest way to start the trip.
There are other possibilities, as well. For example, if you start in the town of Chulilla at the Plaza de la Baronía, you can head directly to the Charco Azul. After that, you can go up and connect with this hike.
However, I found that starting directly at the kiosk building (where you pay your entrance fee) is the easiest way to make sure you don’t get lost!
Important Things to Know
Overall, this hike is relatively easy. For experienced hikers, this will be a very pleasant route without any difficulties.
However, there are a few important things to know about Chulilla. Valencia sees many international tourists, so I wanted to leave a few reminders for people who might not be familiar with the area.
So here are some things you should know before coming to Chulilla:
It gets crowded in the summer
Despite it being a small town, this is a very popular destination for eco-tourism. Both international and local people will come here to escape the city and enjoy this nature trail.
Unfortunately, some parts of the trail are relatively thin. This means that during peak times, you’ll be doing a bit of waiting in line.
That’s especially true at the bridges.
Considering it’s also quite hot in the summer, this is important to keep in mind. So make sure you plan ahead, especially if you have time constraints.
Come prepared
The Chulilla hike ends up being around 3–4 hours long. This means you need to come prepared to handle the outdoors.
Make sure to bring:
- Sunscreen
- Water
- A sandwich or snack
- Hat & Sunglasses
- Hiking shoes
Of course, you can always bring some swim shorts if you’d like to go for a dip in the river, as well. But regardless, you need to make sure you’re able to handle the being outside, under the Mediterranean sun for several hours.
Tip: Come as early as possible. I do NOT recommend doing this excursion during the hottest parts of the day in the summer. While much of it is shaded, the walk back could be very difficult for travelers.
Eat in the town or bring your own food
Compared to Valencia, Chulilla is a super small village without a lot of restaurant offerings. However, there are some places to eat in the main square.
Some of these places might be great options, although they’ll fill up quickly – especially in the warmer months or on the weekend.
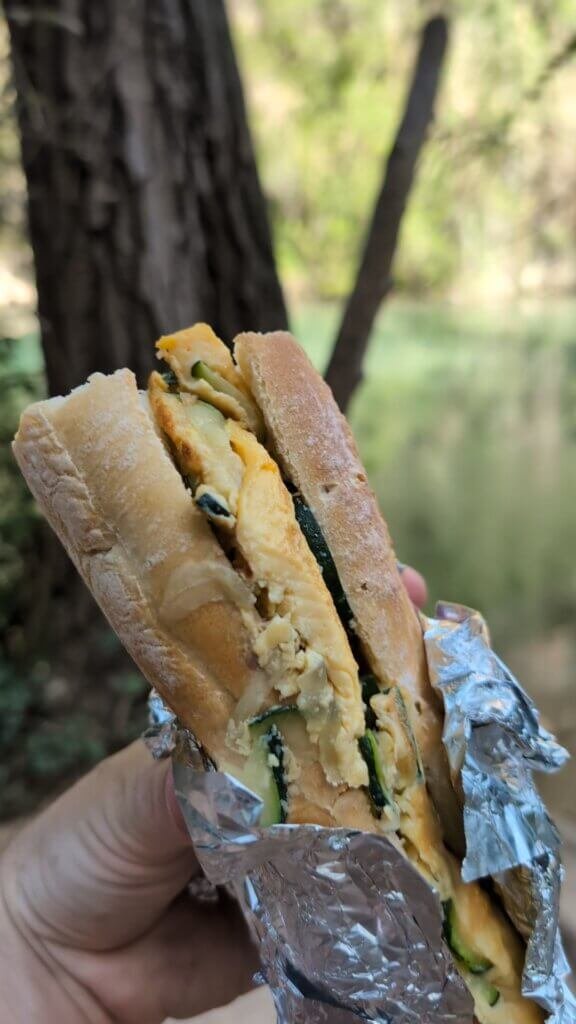
However, I think bringing some picnic food is also a great option. This is what I did on my trip to Chulilla.
I packed a big entrepà (sandwich), some trailmix, a banana, and some water. That was enough for me to get through the excursion with no problem.
So if you’re staying here the whole day, then going to one of the local restaurants might be a great option. Although since I packed my own lunch, I don’t have any specific recommendations. But based on my experience in small towns, I’d imagine they are all more-or-less the same in terms of quality.
Kid-friendly
Overall the Chulilla hiking trip is relatively child-friendly. There are a few spots where you should definitely keep an eye on them. This is because there are some bigger drops, especially towards the first 10-ish minutes of the trail.
But besides that, it shouldn’t be too difficult for kids 6+. If you’re traveling with a child that needs carried, this could be difficult near the bridges. Mostly because of the steep and narrow stairs.
So I would say this is a great excursion for older children, but younger ones will definitely find this difficult. I did come across a family that was traveling with two strollers but… they were struggling a bit.
Relatively easy
That said, this hike is relatively easy for people that already have an active lifestyle.
If you are someone that has difficulties with doing longer bouts of exercise, the most difficult part will be the two minutes before and after the first bridge.
The remainder of the hike is relatively flat.
The good news is – you’re able to stop and turn around whenever you need. If you don’t want to do the entire hike, you can stop whenever you want.
There’s also a small area to rest right after the first bridge.
I’m someone who does really enjoy outdoor hiking, so I might be a bit biased. In my opinion, the hike was a bit long – but not difficult.
When in doubt, follow the river

There are a few spots along the path where you might get confused. For the most part, it is well-marked and there are frequent signs that show you the right way to go.
However, I found there were 3 spots that could cause some confusion.
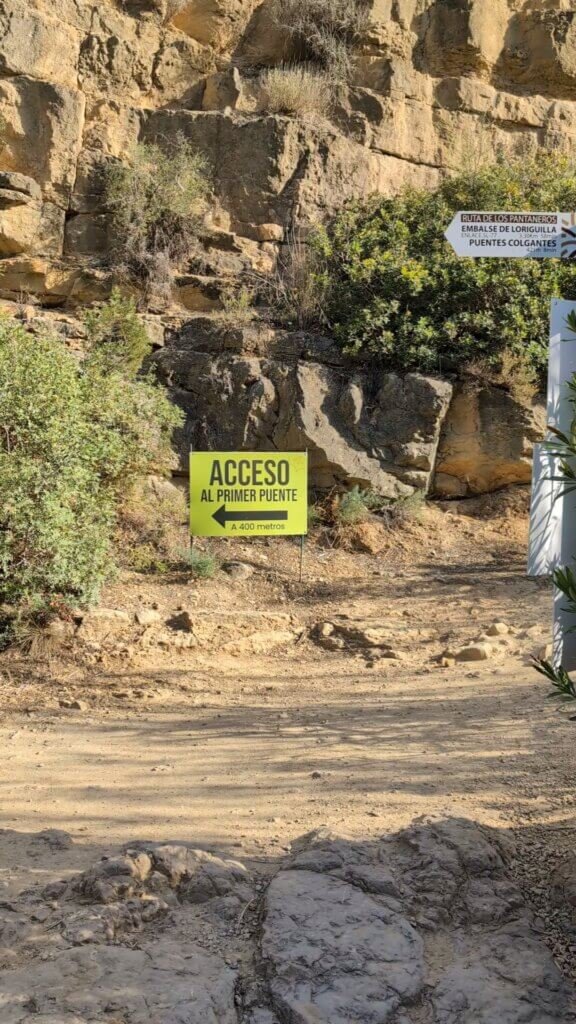
- Right after the initial bend, where you almost do a 180 to follow the river. Just keep following the river here, this is normal. You’ll get to a fork with a large sign that points to the direction of the first bridge.
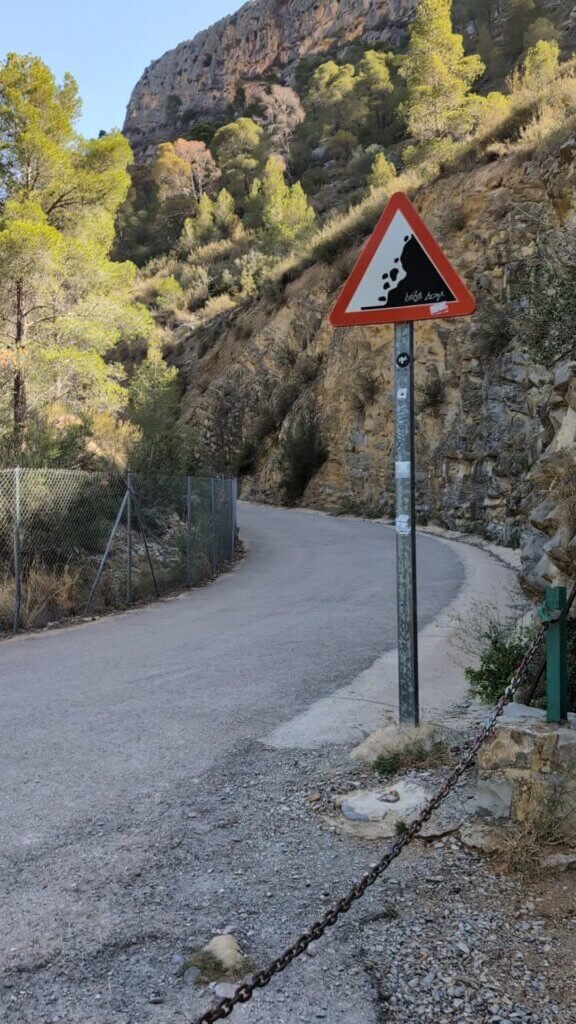
- A third, non-hanging bridge that you don’t cross. This is the picture above. Continue going straight on the path you were already on, rather than crossing. If you turn around, there are sign posts that point to the right direction.
- At the end, you’ll get to a driveable road where you go either right or left. Here, head RIGHT. This takes you straight to the reservoir. If you go to the left, this takes you to the monastery.
And as always – if at any point you’re confused, just keep following the river. It will lead you to either the reservoir or Chulilla.
It costs 1 euro
There is a private company that collects a €1 entrance fee per person. Sometimes these people are at the beginning of the trail, and sometimes they are right before getting to the first bridge.
So make sure you bring some spare change with you before you head out!
Valencia Travel Resources
I hope this guide helps you enjoy your day trip to Chulilla! Valencia has plenty of natural landscapes that are worth seeing, and this hike is one of the most famous.
It is relatively straightforward and shouldn’t prove to be too difficult. Once you find the starting point – everything else is super easy.
➡️ Rent a car to do it yourself or;
And in case you need some other support on your trip to Valencia:
- Where to stay in Valencia
- Valencia 5-day itinerary
- Public transport guide
- Cheap flights to Valencia
- How to get to the city center from the airport
Bon viatge!
FAQs
The easiest way to get to Chulilla from Valencia is by car. It is about a 45-minute drive from the city. As a second option, you can take a private tour bus. There are public transport options as well, but they are less frequent.
The Ruta de Los Puentes Colgantes starts just north of the village of Chulilla, directly off the main road. There is a kiosk, lines for the queues, and a relatively large sign. It is on the OPPOSITE side of the road as the dirt parking lot.
You can start your hike to the charco azul directly in the town of Chulilla. Head south towards the river until you get to “Sendero Charco Azul”. Then just follow the route!
The Chullilla hike is relatively beginner-friendly. It is around 3-4 hours long and is only difficult for 2 minutes before and after the hanging bridges. Everything else is relatively flat, with many shaded areas.
Yes! You can swim in the Charco Azul, or head over and dip your feet in the river. The river isn’t really deep enough to swim, but you can cool off here.
Need help planning your trip to Valencia?
Here are the tools I use for the cheapest (and most reliable) vacation planning:
- 🏠Booking – Affordable hotels and apartments
- 🏠Hostel World – Safe and budget-friendly hostels
- ✈ Kiwi – My favorite tool for cheap flights
- 🚗Discover Cars – Best place for car rentals
- 🚄Trainline – The easiest way to book local trains in advance
- 📶Airalo – eSim cards for easy internet access while traveling
- 🦺Safety Wing – The #1 travel medical insurance
- 💸Airhelp – Cancelled flight compensation (it’s free!)
- 💱Wise – Easiest low-fee way to transfer currency
- 🗂️ Your Spanish Visa – Move to Spain the easy way
- 🍊 My Tourist Card Calculator – Find out if the VLC travel card is worth it for you
Affiliate disclosure: This post may contain affiliate links. These are links to services I personally recommend using for your trip to Valencia. At no extra cost to you, I may earn a small commission from these brands if you choose to make a purchase. Your support helps me pay my bills and eat more bunyols!


